Showing posts with label Tips - Tricks. Show all posts

Macro : Copy Multiple Columns into 1 Continuous Column in a New Sheet

Below is a VBA Macro to copy multiple columns of variable length into one continuous column in a new sheet. Hope it helps you reduce the time at your work place.

Sub OneColumnV2()
''''''''''''''''''''''''''''''''''''''''''
'Macro to copy columns of variable length'
'into 1 continous column in a new sheet '
''''''''''''''''''''''''''''''''''''''''''
Dim iLastcol As Long
Dim iLastRow As Long
Dim jLastrow As Long
Dim ColNdx As Long
Dim ws As Worksheet
Dim myRng As Range
Dim ExcludeBlanks As Boolean
Dim mycell As Range

ExcludeBlanks = (MsgBox("Exclude Blanks", vbYesNo) = vbYes)
Set ws = ActiveSheet
iLastcol = ws.Cells(1, ws.Columns.Count).End(xlToLeft).Column
On Error Resume Next

Application.DisplayAlerts = False
Worksheets("Alldata").Delete
Application.DisplayAlerts = True

Sheets.Add.Name = "Alldata"

For ColNdx = 1 To iLastcol

iLastRow = ws.Cells(ws.Rows.Count, ColNdx).End(xlUp).Row

Set myRng = ws.Range(ws.Cells(1, ColNdx), _
ws.Cells(iLastRow, ColNdx))

If ExcludeBlanks Then
For Each mycell In myRng
If mycell.Value <> "" Then
jLastrow = Sheets("Alldata").Cells(Rows.Count, 1) _
.End(xlUp).Row
mycell.Copy
Sheets("Alldata").Cells(jLastrow + 1, 1) _
.PasteSpecial xlPasteValues
End If
Next mycell
Else
myRng.Copy
jLastrow = Sheets("Alldata").Cells(Rows.Count, 1) _
.End(xlUp).Row
mycell.Copy
Sheets("Alldata").Cells(jLastrow + 1, 1) _
.PasteSpecial xlPasteValues
End If
Next

Sheets("Alldata").Rows("1:1").EntireRow.Delete

ws.Activate
End Sub
Below are the steps to be followed to run the macro on the required data.
  1. Copy below mentioned VB Macro code
  2. Open Excel and Press Alt + F11 to open VB Project
  3. On left panel, Right click on "This Workbook" under VBA Project
  4. Go to Insert > Modules
  5. Paste the below copied VB code on the right white panel.
  6. Press Cltr + S to save the workbook
  7. Click on the Macro Button to copy every sheet to new workbook
  8. Enjoy.,

Find Last Blank Value (Space) in Excel Cell

How to find Last Blank Value, which is nothing but Space in a Excel Cell? This might be useful to get the Last word separated in to another column. For Example - You want to get City Name into the another column from the Address mentioned in the First column.

Firstly, Lets start with find the last blank value. Formula would be :

FIND("☃",SUBSTITUTE(A1," ","☃",LEN(A1)-LEN(SUBSTITUTE(A1," ",""))))

You can divide it into 3 parts:

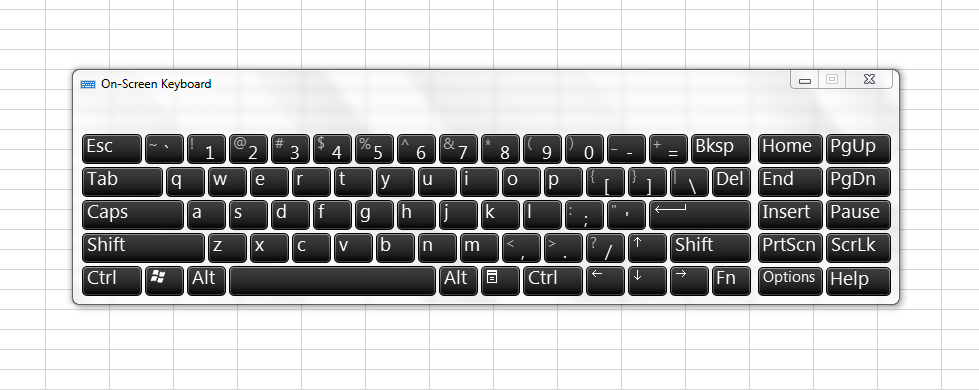
How to Activate On Screen Keyboard (OSK) ?

How to activate On Screen Keyboard (OSK) in Windows Laptop / Computer ? Firstly you might thing why i would require to activate On Screen Keyboard ? The Answer is simple, when you require to use the Key (Like Scroll Lock)which is not provided on your physical keyboard.

Below are the two alternative methods to activate On Screen Keyboard :


Recover Missing Icon in S3 (GT - I9003) - In Pics

Firstly, Get relax, Your application is still there. Below is the process to Recover (Find) your Missing Icon in Galaxy S3 (GT I9003) or any other Android Device with Screenshots.


How to Activate Facebook timeline (F8) right now ?

How to activate latest buzz on Facebook - Facebook timeline (F8 conference) before September 30th 2011, which is the official launch date of Facebook timeline. Below are the easy steps to follow to activate Facebook timeline before it gets launched public on September 30th 2011.


If you are willing to create brand new Facebook Timeline - Here are the easy Eight Steps to follow on Facebook : - 
  1. Log in to Facebook.
  2. Follow the developer page right here to get started for Facebook Timeline.
  3. Click on the Allow button to grant premision to developer Facebook Application.
  4. Click new Application on the next page.
  5. Fill the App Display Name & App Namespace (don;t worry) Fill what ever you want.... it hardly matters & click on continue button...
  6. You'll see the next screen, entitled "Get Started with Open Graph" -- fill in anything you want (it doesn't matter) in those fields under the heading "start by defining one action than one object for your app." Click Get Started.
  7. On this screen, do nothing except scroll to the bottom and click "Save Changes and Next." Do the same thing on the next screen.
  8. You'll be taken to this screen. Wait a few minutes, and then go to your Facebook homepage. That's where you'll be invited to enable Timeline. Be patient at this point -- sometimes it requires you to wait before the changes take effect
  9. When you go back to your Facebook homepage, you'll see this. Success! Click Get It Now, and you're in!
Enjoy your Facebook Timeline.. Share the same with your friends on facebook.... Note : - Your timeline would be visible to the friends who have activated there developer option and rest all can see the same on 30th September 2011. (Official Date for Facebook Timeline to go on Air) Via

Enable Excel drag & drop option (+ sign in cell corner)

Excel problem ? Not able to get drag & drop option (plus (+) sign in bottom right corner of the cell), which help user to drag & drop the values in the incremental sequences. Don't worry, you have or due to some macro , your excel option of fill handle & drag & drop has got disabled. You need to activate (enable) the fill handle & drag-drop option again.
How to Enable Microsoft Excel Drag & Drop Option ? 
  1. Click File Menu 
  2. Go to the option (Excel 2010) 
  3. Click on the Advance tab on the left side of the window 
  4. Tick the 3rd option of Fill handle & drag-drop to enable your dragging option 
  5. That's All


Hope, this helps you .. would be posting on some of the more important & simple tricks as a daily dose of information @ Office

Solved Angry Bird PC Error & Trouble Shooting (Texture is too large)

How to solve Angry Bird PC Game Errors & Problems ? Solution for all the Angry Bird PC Game Errors & trouble shooting is provided in the post. Some of the Angry Bird PC Version major errors & trouble shooting are : - 
  1. Texture is too large: 2048 x 2048, maximum supported size: 1024 x 1024 / The Texture Is Too Large
  2. This application has failed to start because the application configuration is incorrect / Error Reinstalling the application may fix the problem

Below are the Fix / Solution for all the four Angry Bird PC Version major errors & trouble shooting along with detail explained & alternative solution..

Outlook Rule : - Moving sent mails to a archived folder

I am going to discuss Outlook rule which would save you time spend on archiving (manually) all the sent emails to the personalized archived folder, importantly without keeping the copy in the default sent folder.

Step I – Creating Outlook Rule to move / copy all the sent mail automatically to a personalized archived folder.
  1. Open Rule & Alert Wizard
  2. Click on the New Rule Option, which opens “Rules Wizard”
  3. Select the option “Apply Rule on Messages I Send” under “Start from a blank rule” & Click Next
  4. Under “Select Condition” drill down to the last option “on this computer only” & Click Next
  5. Under “Select Action” Select the 2nd Option “move a copy to the specified folder”
  6. Now Click on the Specified to select the Archived Folder for all the sent Items
  7. Click Finish & Run the Rules

Now, that we are ready with the Outlook rule which would make a copy of all the sent mails to an archived folder but with a copy in an default sent folder also. By default, Outlook keeps a copy of messages that you send in the Sent Items folder, Next step is to remove a default copy of the sent emails in the sent folder, so that we don’t have a duplicate emails.

Step II – Option to Move instead of Copy all the Sent Mail automatically to a personalized archived folder. 

If the Save copies of messages in Sent Items folder check box is not selected, the Sent Items folder won't keep a copy of each message that you send. The Save copies of messages in Sent Items folder check box is selected by default. To select the setting, do the following:

  1. On the Tools menu, click Options.
  2. On the Preferences tab, click E-mail Options.
  3. Under Message handling, un-select the Save copies of messages in Sent Items folder check box.


    If you disable the option to save sent items in Sent Items, then the rule will do what you seek since only the copy you put in the folder with the rule will exist. But Outlook won't create another one in Sent Items.

    Now, you need not manually drag / move all the sent items to the archived folder periodically.

    How to Show - Hide Status Sheet Tag Bar in Excel 2010 / 2007 ?

    If you have lost your Status bar in Excel 2010 / 2007, it might be due to some macro or a option available in the Excel 2010 / 2007. You can show or even hide the status bar in Excel 2010 /  2007 via a option in build in the Excel and also via VBA trick. In Excel 2010, there is the in build option available for the users to show / hide the status bar in accordance to there need. Steps to Show - Hide Status Bar in Excel 2010 are as below :